Payment Page
Payment Page Overview
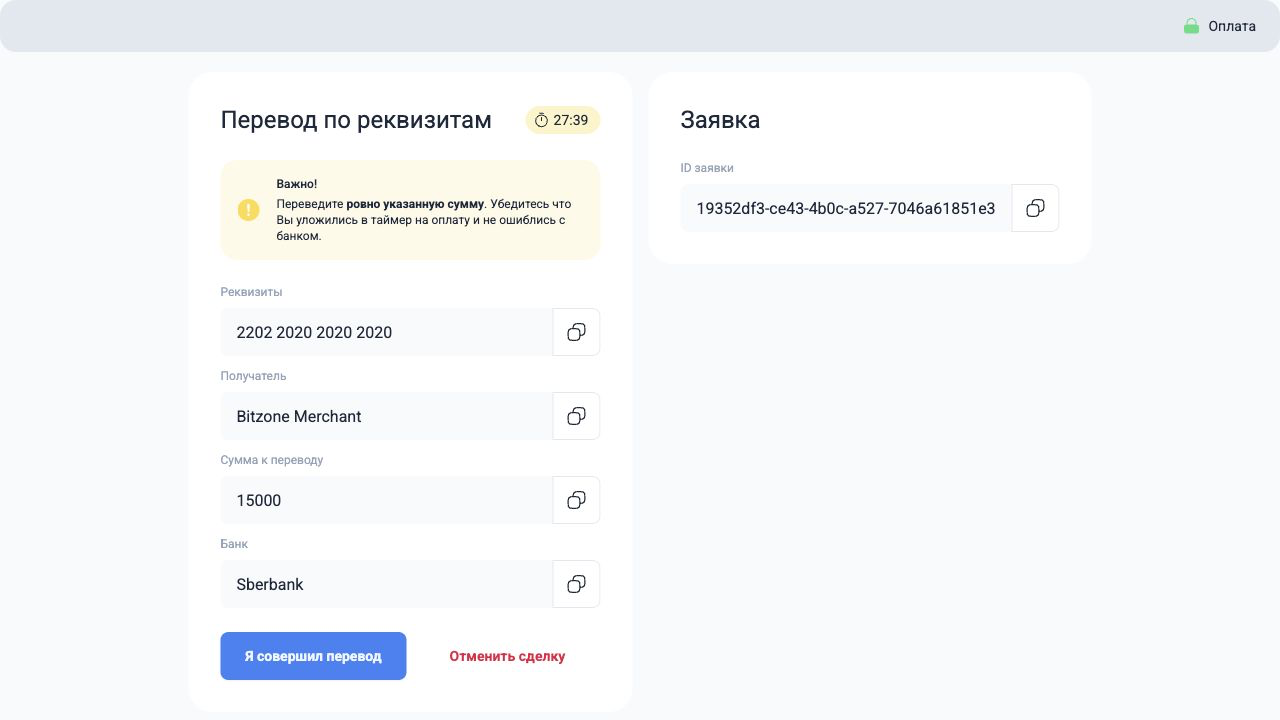
The Payment Page provides a user-friendly interface where your customers can view payment details, such as account information, amount, and a transaction timer. This page facilitates seamless payments and is designed for compatibility with both desktop and mobile devices.
Accessing the Payment Page
To utilize the Payment Page for your users, follow these steps:
-
Create a Pay-In Transaction
- When you create a pay-in transaction, the API response will include an
externalPaymentPageUrl. - You can either redirect your users to this URL or embed the page directly into your website as an iframe for a more integrated experience.
- When you create a pay-in transaction, the API response will include an
-
Security Considerations
- It is crucial to ensure that the user data provided in the
extraobject (e.g., IP address, user agent, fingerprint) matches the actual details of the user attempting to access the Payment Page.
- It is crucial to ensure that the user data provided in the
If these details do not match, the user will be denied access to the Payment Page for security purposes.
Key Features
-
User-Friendly Interface:
The Payment Page simplifies the payment process by displaying all necessary details in a single, intuitive layout. -
Cross-Device Compatibility:
The page is optimized for both desktop and mobile platforms, ensuring a smooth user experience regardless of the device. -
Timeout and Recovery:
- If the user does not complete the payment within the allotted time, the transaction is moved to the
canceledstatus. - Users can later upload a receipt and submit it for verification. When this occurs:
- The transaction is transitioned to the
disputestatus. - Our operators will review the transaction.
- The transaction is transitioned to the
- If the user does not complete the payment within the allotted time, the transaction is moved to the
-
Automatic Closure:
If the transaction is not reviewed by an operator within 30 minutes, it will automatically be closed in favor of the merchant.
UTR Support For INR Trades
For INR pay-in trades, the payment page can confirm payment by utr instead of invoice upload.
- The page accepts either
invoiceKeyorutrin confirmation and dispute requests. - Sending both values in the same request is invalid.
utrconfirmation is available only for pay-in trades withfiatCurrency = INR.- Payment-page confirmation expects a
12-digit numericutr. - Each UTR must be unique across pay-in trades.
Recommended integration:
- Redirect the customer to the hosted payment page as usual.
- For
INRtrades, ask the customer to enter the bank UTR after the transfer is completed. - Use UTR as the primary proof of payment for this flow, and keep invoice upload as a fallback only where needed.
When UTR confirmation succeeds, the trade is marked as paid and the standard merchant callback flow is triggered.
Custom Domains
-
How to add your domain:
Using merchant panel, user can add their own domain to customize Payment page appearance.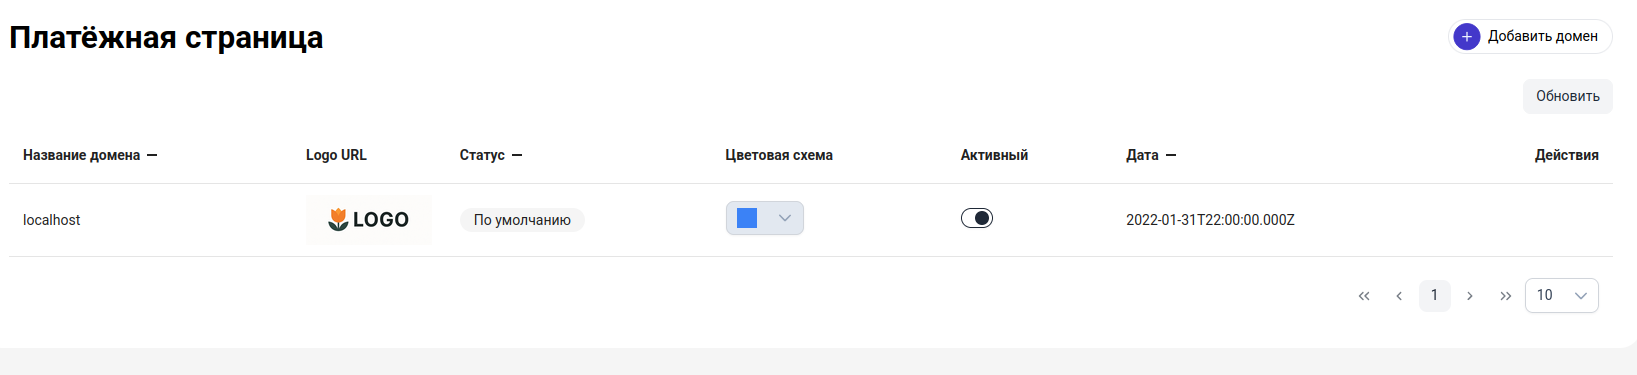
-
Domain activation:
After adding your domain you will be provided with a pair of nameservers. You'll need to install it in your domain provider and wait for domain to be verified and listed in DNS records. -
Statuses:
- When you add a domain and your domain is pending until it is verified.
- Verification shouldn't take too long, usually a few minutes after merchant added correct nameservers.
- After your domain is verified and added to DNS records, its status will change to active.
-
Payment page URL:.
- We select a random domain based on the merchant's activated domains when the trade is created.
- The merchant can deactivate domains they do not want to use.
- A merchant must have at least 1 active domain.
- If no custom domains are added, the payment page will be available at
https://pay.bitzone.space. - Each merchant is assigned our domain by default.
-
Customization:
- Each payment page can be customized in two ways: Logo, Color scheme.
- Each newly created domain has assigned default logo and blue color scheme.
- Merchant can provide their custom logo or change color scheme in Edit Domain modal window.
- There are 4 different color schemes: blue, red, gray and green.
By leveraging the Payment Page, you can provide a secure and efficient payment solution tailored to the needs of your customers while maintaining control and transparency throughout the transaction process.